Plot a felt garland

Description
Spring is just around the corner! Now is the time to bring spring INSIDE too! Today we're going to show you how to easily make your own modern felt garland with Cricut! A Cricut is perfect for lots of creative projects such as textile finishing or sewing, but also for DIY beginners. For the spring garland, we work with the Cricut Maker, the Cricut Joy, and the EasyPress Mini to add the delicate lines as finishing touches.
You'll Need:


Select motifs
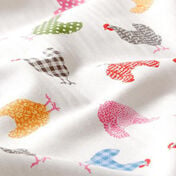
Pick two or three designs for your garland! We have chosen these cut files for our flower, butterfly and rabbit! Decide which motif you want to cut from which colour felt. For our garland we have chosen a black rabbit, a pink butterfly and a grey flower! You can of course use your own favourite colours for your garland!

Cut felt
After uploading the selected images to Design Space, you can easily add them to the Canvas. Resize the images to the desired size. Our rabbit measures 10 x 11cm, our butterfly 10 x 8 cm and our flower 12 x 11 cm. You can also change the colour of each shape. They don’t need to reflect the exact colour of your felt, just make sure that all shapes you want to cut from the same material, have the same colour.
Place your felt on the FabricGrip mat (the pink one, which is included with the Maker) and load it into your machine. If you’ve chosen thicker felt, you will need to use the Deep Point Blade with your Maker, which is perfect for cutting smoothly through thicker materials such as felt.
The program will now guide you step by step through the cutting process.

Plotter Motif Accessories
As soon as the Maker has finished cutting your shapes, flip the mat material down and peel the mat away from your material. You can now carefully weed your shapes, which means you remove any excess material that’s not part of your shape.

Cut plotter film
To make our shapes pop, we used our images to cut shapes from Iron-On Foil! We used the Cricut Joy, but you can also continue to work with your Maker. Just make sure you switch to your Fine Point Blade!
Place your Iron-On Foil with the shiny side down on your Standard Grip (green) cutting mat.
Top Tip: Make sure to mirror your design before cutting, something you always need to do when working with Iron-On!
After your machine has cut the designs, carefully peel the mat away from the material. Now you can weed the designs using your Weeding Tool. Since the lines in our example are delicate, patience and professional tools such as the Cricut Weeding Tool are recommended.

Position flex film
Time to apply your Iron-On finish to your felt shapes! Turn your Easy Press Mini on. It will beep when the machine has heated up. Once it has, place the Iron-On Foil designs with the shiny side up onto the felt.

Iron plotter film
To protect the felt, you can cover it with baking parchment. Now you move your Easy Press Mini over your Iron-On Foil as stated in the heat guide. Wait until the design has cooled before carefully removing the protective film.

Assemble felt garland
Now you have all the elements for your modern spring garland! In the last step, you simply use needle and thread to attach the elements in the order you want!

Ready
We wish you a lot of fun crafting and a lot of fun with your new spring decoration! Incidentally, this idea is just one of the many possibilities that you can make with Cricut! With a Cricut smart cutting machine, there’s (almost) no limit to your creativity!