Sew a yogabag

Description
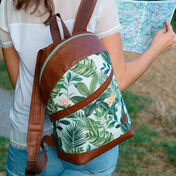
You're in love with yoga? And you like being creative on your sewing machine? We've got great sewing instructions for you to combine both your hobbies: A made-to-measure customised bag for your yoga mat. It's not only handy and very beautiful but also avoids mix-ups with other bags and mats at your yoga course. Use your imagination to create your own round bag and increase your anticipation for your next Shavasana.
You'll Need:


Cut
Please mesure your rolled up yoga mat to make sure that these measurements apply for your yoga mat as well.
Inner fabric:
2 circles with a diameter of 16 - 17 cm
2 rectangles with width 24 cm and length 76 cm
Outer fabric e.g. canvas:
1 circle with a diameter of 16 - 17 cm
2 rectangles with width 24 cm and length 40 cm
2 rectangles with width 3 cm and length 8 cm
Outer fabric faux leather:
1 circle with a diameter of 16 - 17 cm
2 rectangles with width 24 cm and length 40 cm

Prepare the outer fabric
Put the imitation leather right side on right side on your cotton rectangle and sew them together with a seam allowance of 1 cm. Now, turn the left side towards you and edgestitch the seam. Repeat with the other outer part.

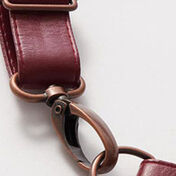
Prepare the zip
Cut two small rectangles (width 3 cm x length 8 cm) of the outer fabric. Measure how much of the zip you'll need for your bag (better too long than too short), fold the small rectangle and sew the 3 x 4 cm piece onto the zip on both ends. Be careful sewing on your zip so your needle won't break.

Sewing the zip
Put the inner fabric with the beautiful (the right) side towards you in front of you, place the zip with the cursor on the upside on the lower longitudinal side and then put the outer fabric with the beautiful side upside down on it. Pin the three layers and sew the zip with the aid of a zip foot. Leave a seam allowance of 1 cm on both ends.

Now continue with the zip
To sew the zip and the other side together you put the outer fabric with the beautiful side up in front of you. Put the zip with the side you've already sewn with the beautiful side upside down on it. Now you have two pieces right side on right side in front of you. Repeat the sewing process explained in step 3.

Step zip
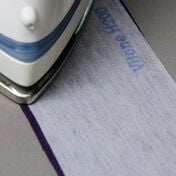
Now fold both fabric sides, smooth them (depending on the material, ironing carefully is possible, too) and edgestitch.

Turn opening
The zip is ready and you can change the foot. Now, sew the outer fabrics right side on right side together and repeat with the inner fabrics leaving an opening for turning of about 18 to 20 cm. Afterwards, open the zip at least half so you can turn the bag.
")
Sew the bottom (for advanced users)
Caution: This step is a bit tricky. Below you'll find an alternate guide for more beginner sewists.
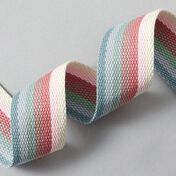
Now sew the bottom pieces to the inner fabric first. The pretty side points into the half-finished bag. Pin neatly and sew slower if you are still a bit unsure about curves. Check in between if the bottom is big enough. For the outer fabric, do the same. However, at the height of the zipper, sew the webbing in place by sewing the nice side of the webbing facing the right side of the outer fabric between the bottom and the outer fabric. The webbing is inside the pocket. Repeat the process on the other side. Make sure the webbing is not twisted. Now sew all three layers (inner fabric, ribbon and outer fabric) again at the level of the webbing. Skip the next points and continue with step 13.
 1/5")
Sew the bottom (for beginners) 1/5
If you're feeling a little uncertain, try our beginner friendly method for this step - you don't need to cut the circles from the inner fabric!
Turn the bag over now and sew the lining and outer fabric together at the circular openings with an auxiliary seam within your seam allowance.
 2/5")
Sew the bottom (for beginners) 2/5
Now also secure your webbing with an auxiliary seam inside the seam allowance. Sew right sides together and make sure that your strap is not twisted.
 3/5")
Sewing the bottom (for beginners) 3/5
Now pin your circles of outer fabric right sides together into the openings, this can be a little tricky, take enough time and pin neatly. Then sew the circles with 1cm seam allowance.
 4/5")
Sewing the bottom (for beginners) 4/5
Great, the circles are now sewn on! You can now finish this seam either with your overlock or a zigzag stitch on your sewing machine.
 5/5")
Sewing the bottom (for beginners) 5/5
Alternatively, for an even more beautiful result, you can also bind your seam with bias tape. Use ready-made bias tape or make your own from your lining fabric. Now enclose your seam between the bias tape and topstitch it close to the edge. Make sure you get both sides of the bias tape.

Turning the bag
At the end you turn your bag inside out and close the opening for turning either with a seam by the sewing machine or with an invisible stitch by hand.